Manual contents
1. Home Screen
On this page
Basic Navigation & Gesture Operations
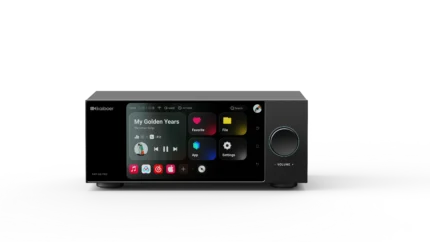
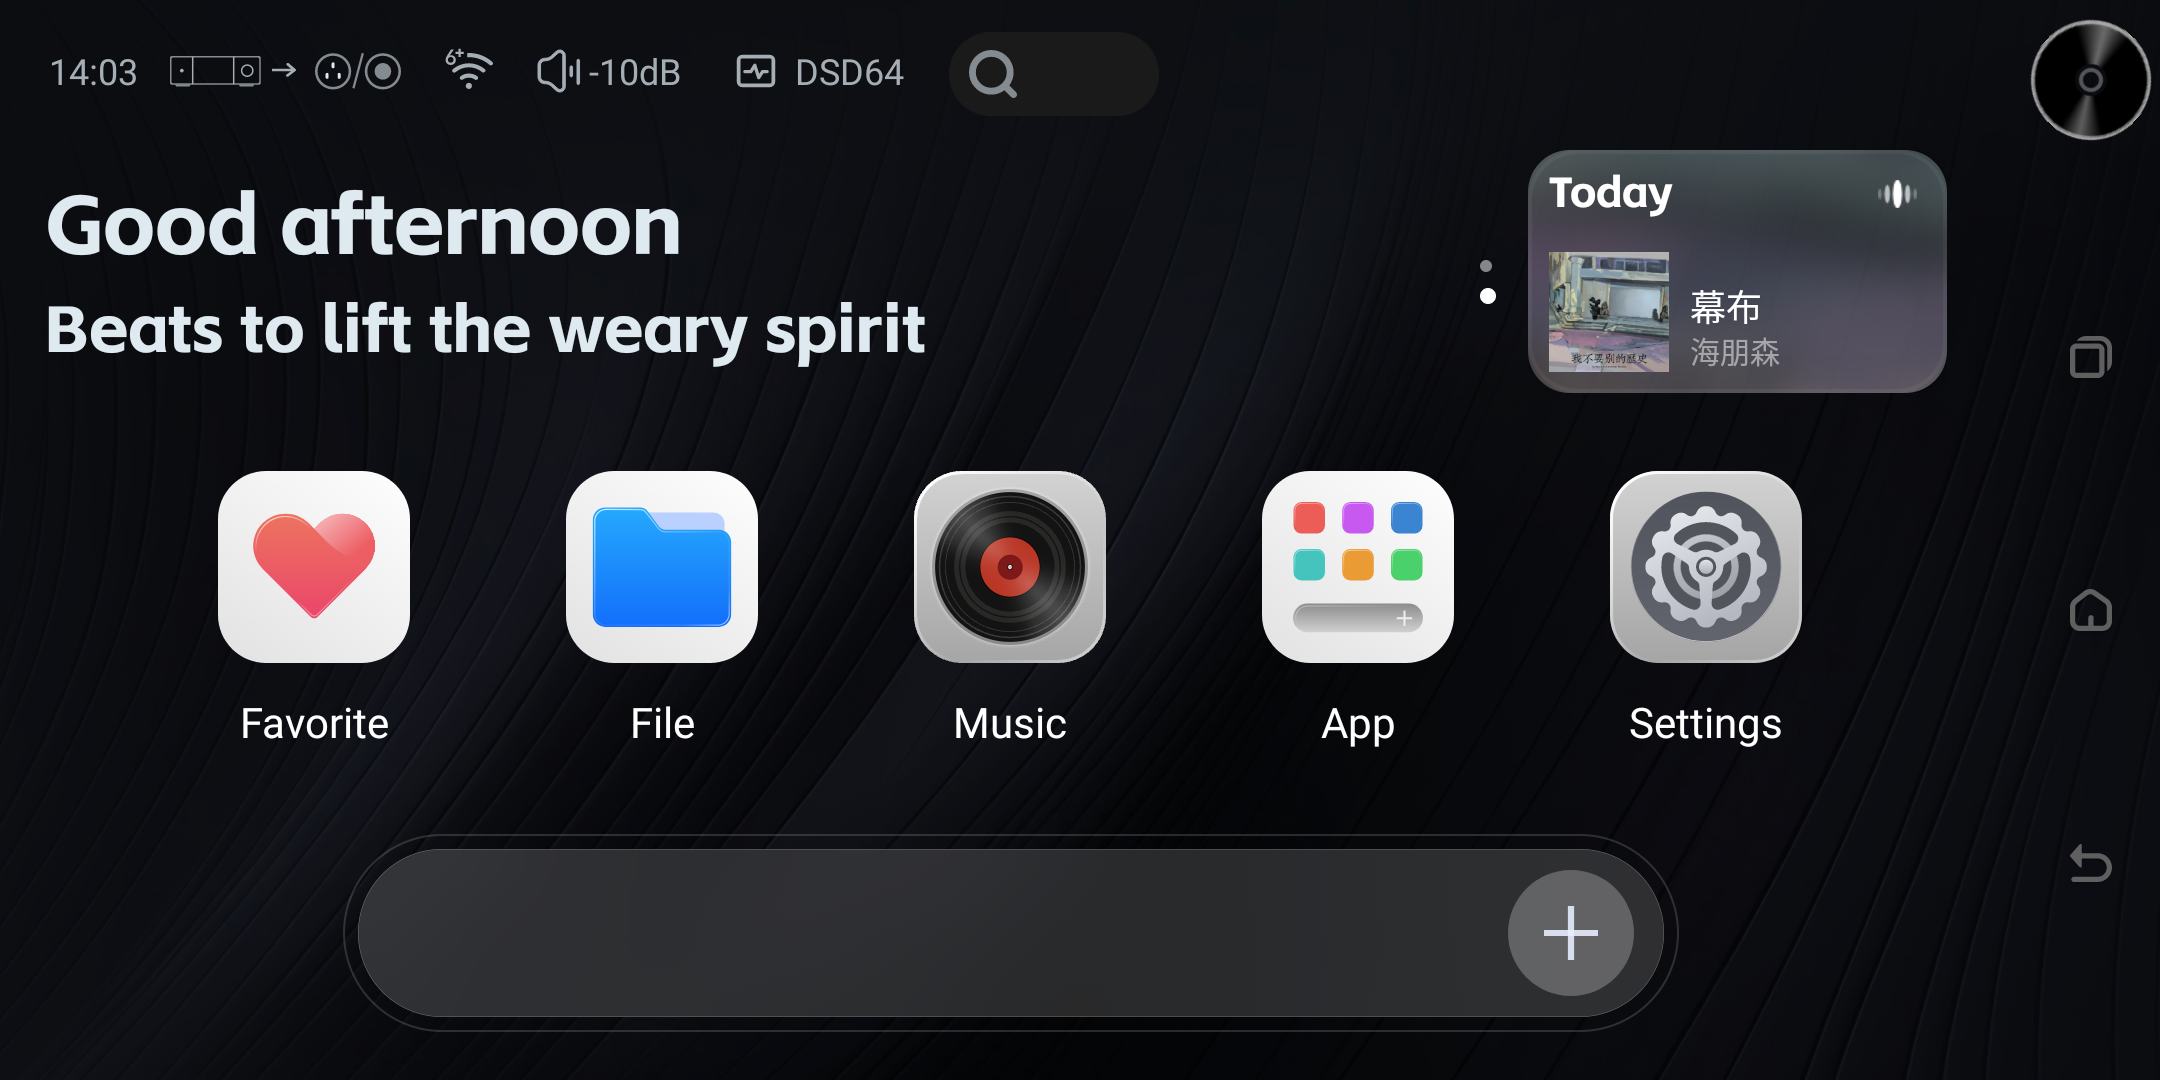
The device home screen uses gesture and sidebar navigation to help you switch quickly between functions.
Gesture Operations
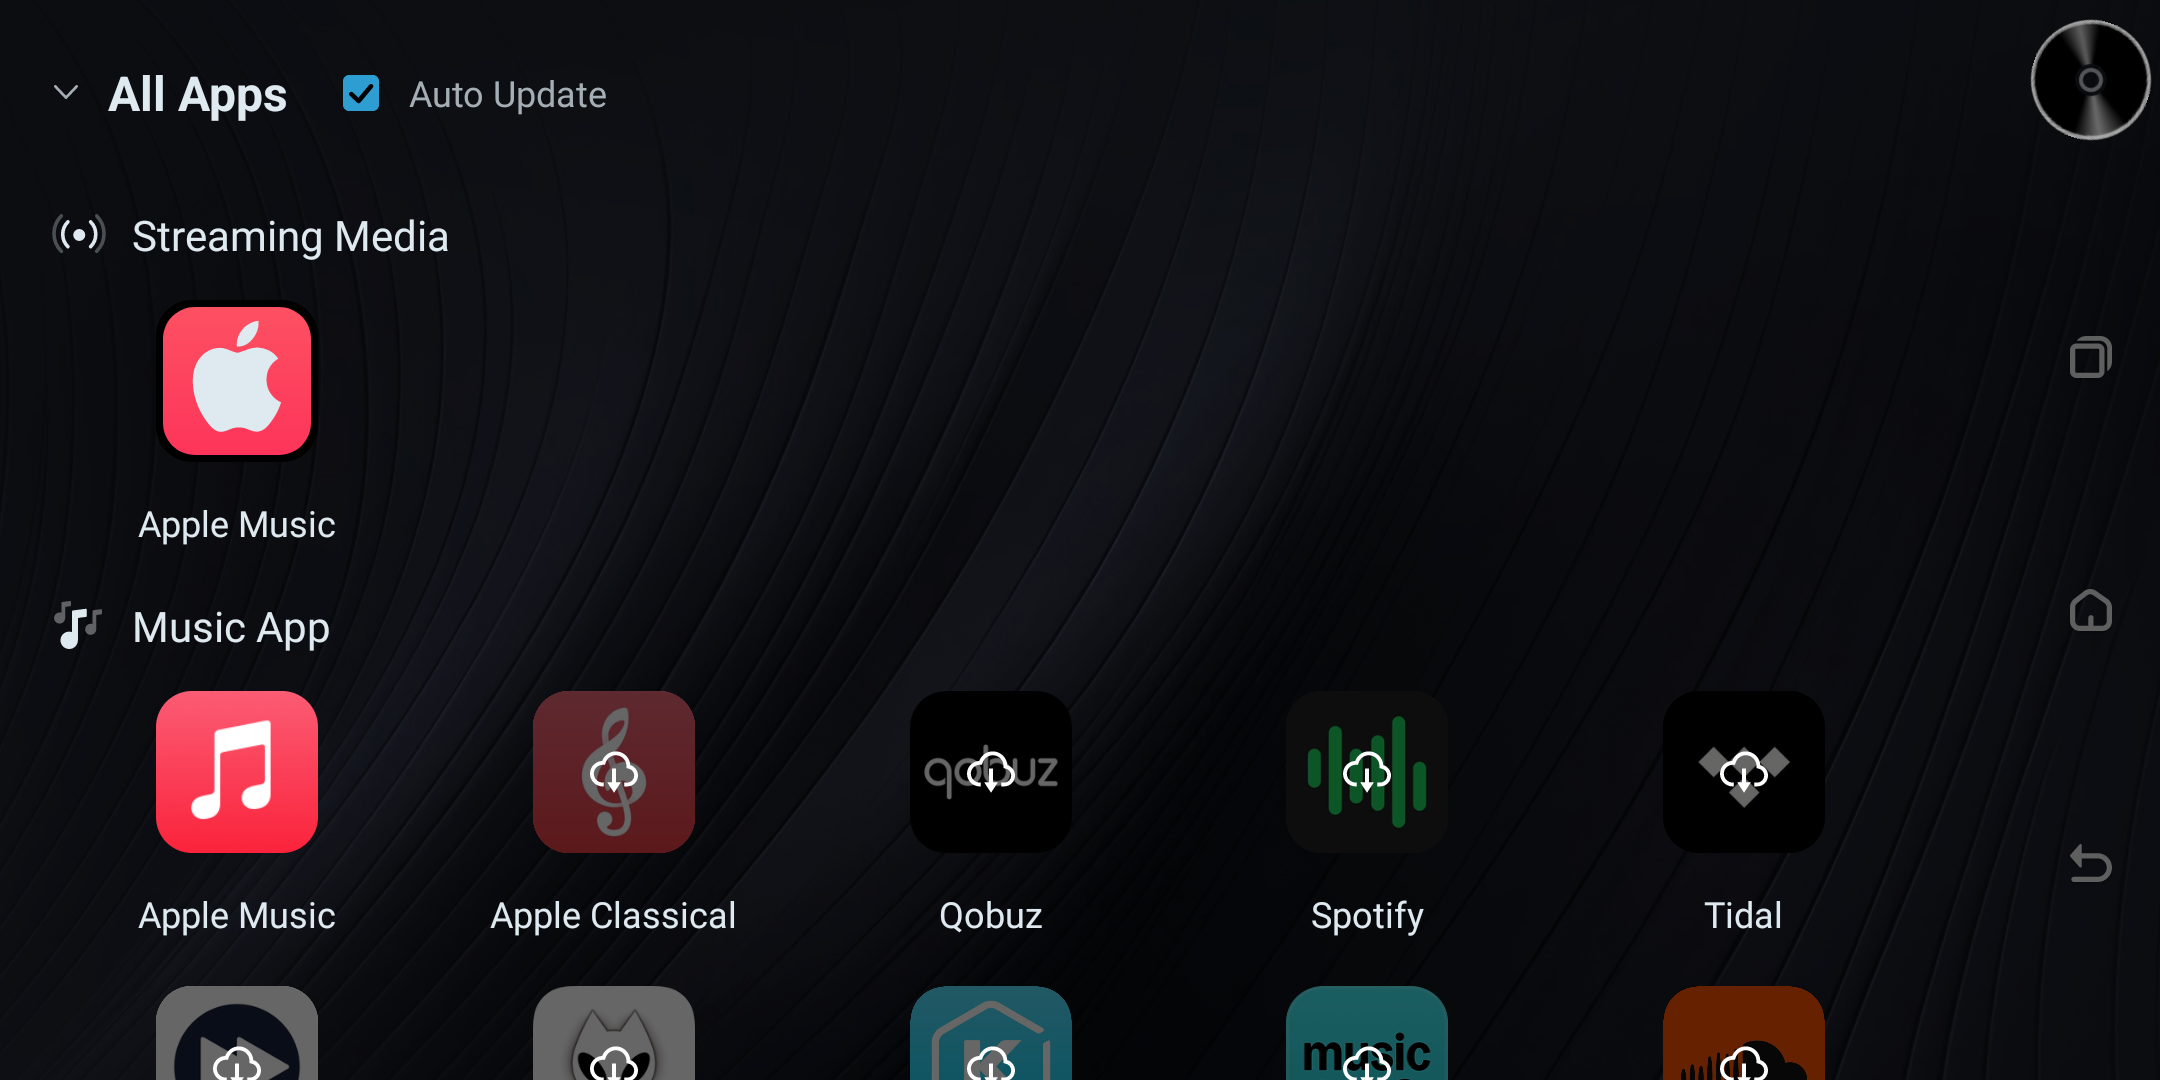
- Swipe up: Enter the "All Apps" list. Here you can find all installed streaming, cloud-drive, and media apps.
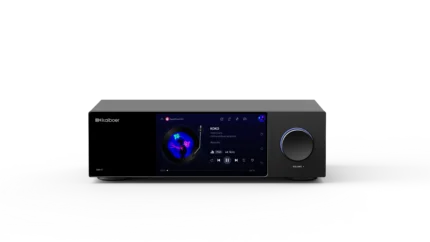
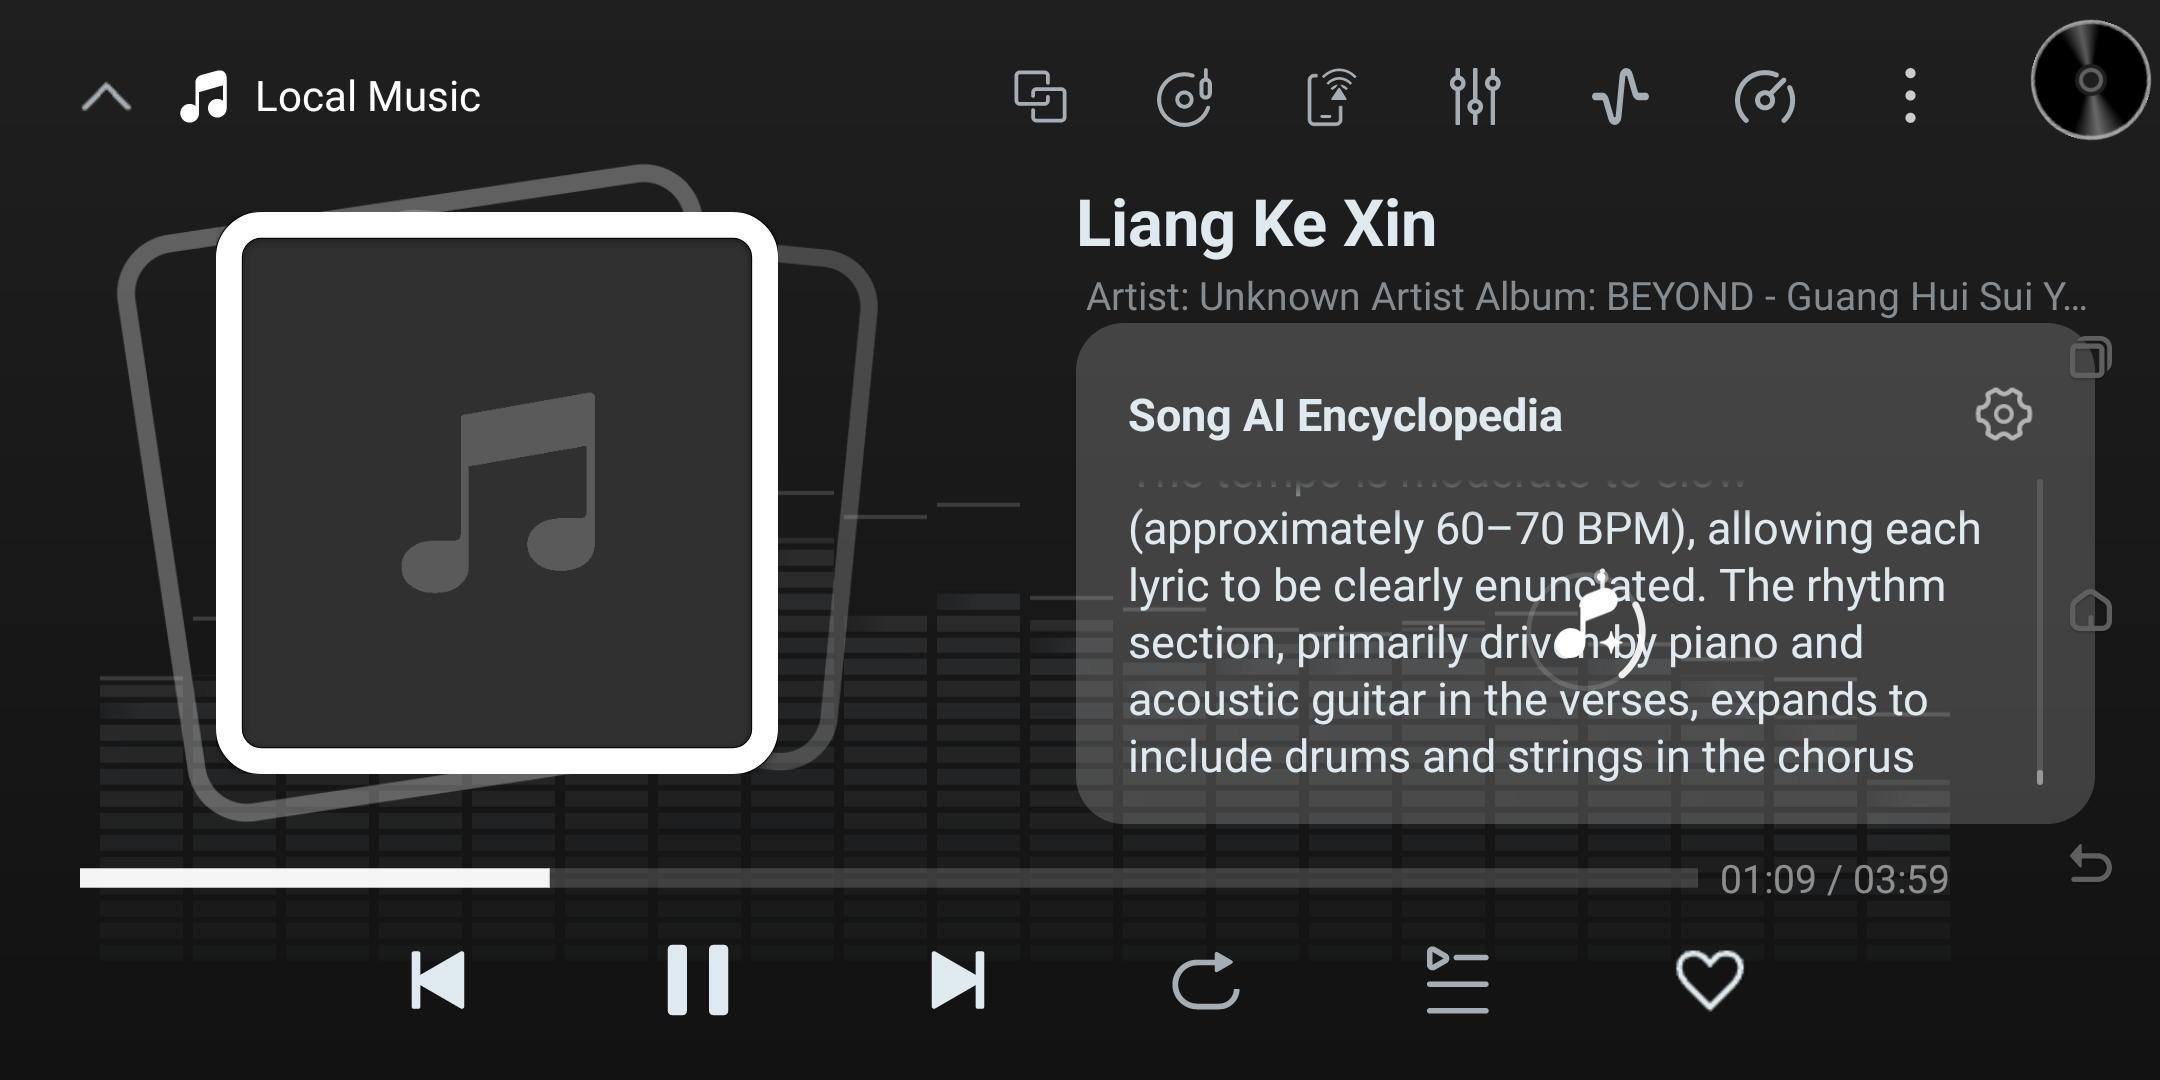
- Swipe down: Enter the "Music Player" interface, which shows the currently playing track details, album cover, and control buttons.
Right-side Navigation Bar
The fixed navigation bar on the right edge of the screen provides global controls:
- Multitask icon (first, overlapping rectangles): Tap to enter the "Multitask Manager". You can view background apps, switch quickly, or tap "Clear All" at the bottom to free up memory.
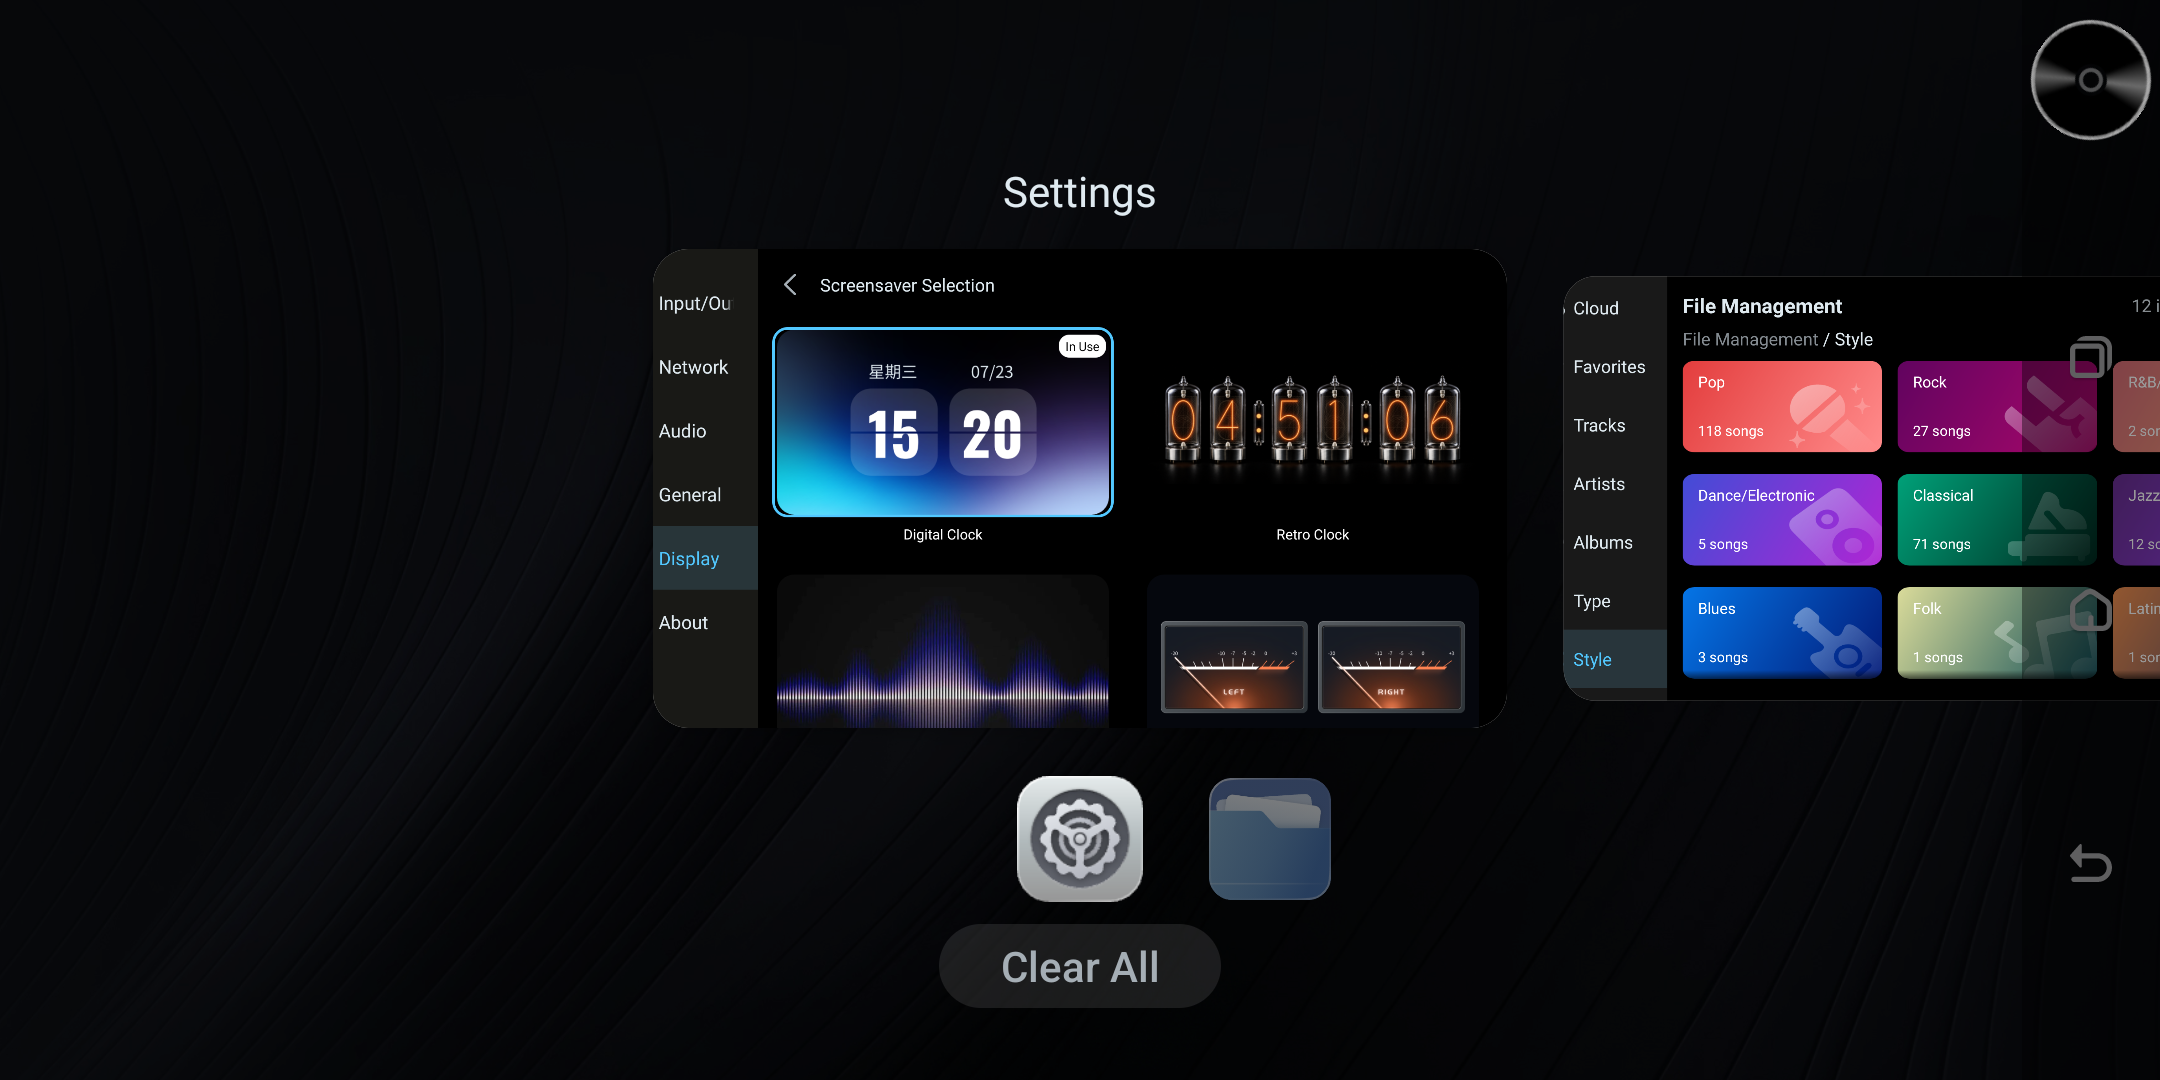
- Home icon (middle, house shape): Tap to return to the "KBELauncher main screen" instantly, no matter which app you are in.
- Back icon (last, curved arrow): Tap to "Go back" to the previous menu or exit the current action.
Main Interface Overview
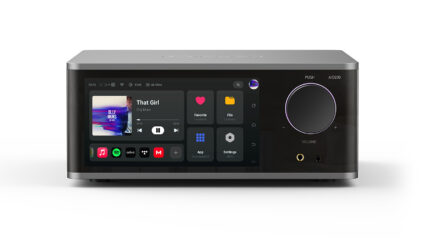
The main interface is clean and simple, and mainly contains the following core entries:
- Quick-app icons:
- Collection: Quickly view your favorite music or content.
- Files: Manage files in local storage or external devices.
- Music: Jump straight into the music player.
- Apps: Open the app drawer. Among them, "Cloud Link (Klink)" is Kaiboer's self-developed cloud-drive aggregator that centrally manages multiple cloud drives and remote storage — see the 7. Cloud Link App guide.
- Settings: Enter the system and audio settings screen (including the Hi-Res Upsampling Engine — see the 5.2 Settings App – Hi-Res Upsampling Engine guide).
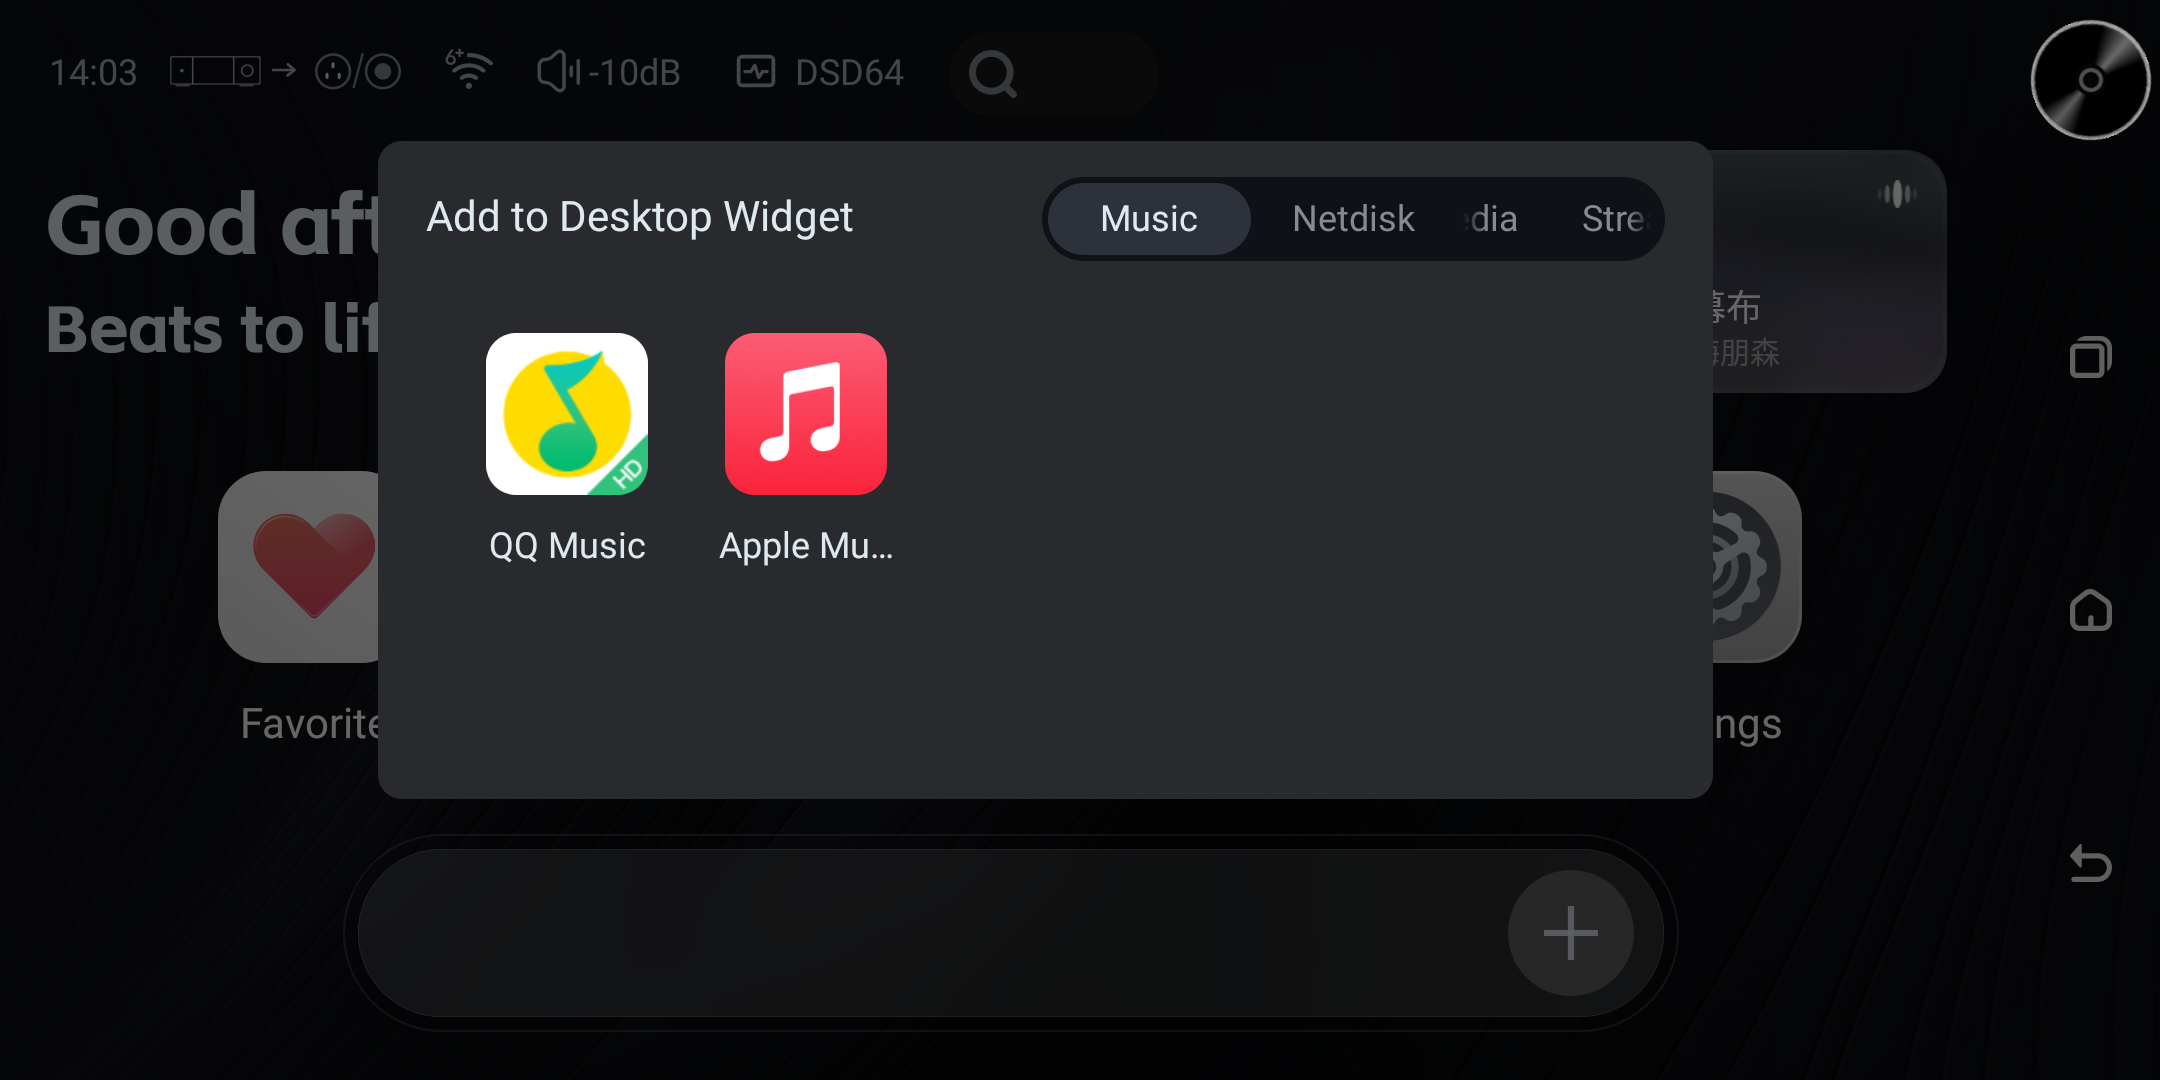
- Desktop widgets: There is a long widget area at the bottom of the screen. Tap the "+" on the right to add frequently used music apps (e.g. Apple Music) to the desktop quick launcher (up to 7 quick apps).
- Status information: The top shows the time and network status, plus the sample rate of the playing track; the top-right shows the currently playing song and weather info.
- Sample-rate display: To meet audiophiles' strict requirements for high-quality audio, this custom desktop integrates a professional real-time audio-status monitor in the top system status bar. With this feature you can always see the current output quality of the system audio.
- Interface illustration & position
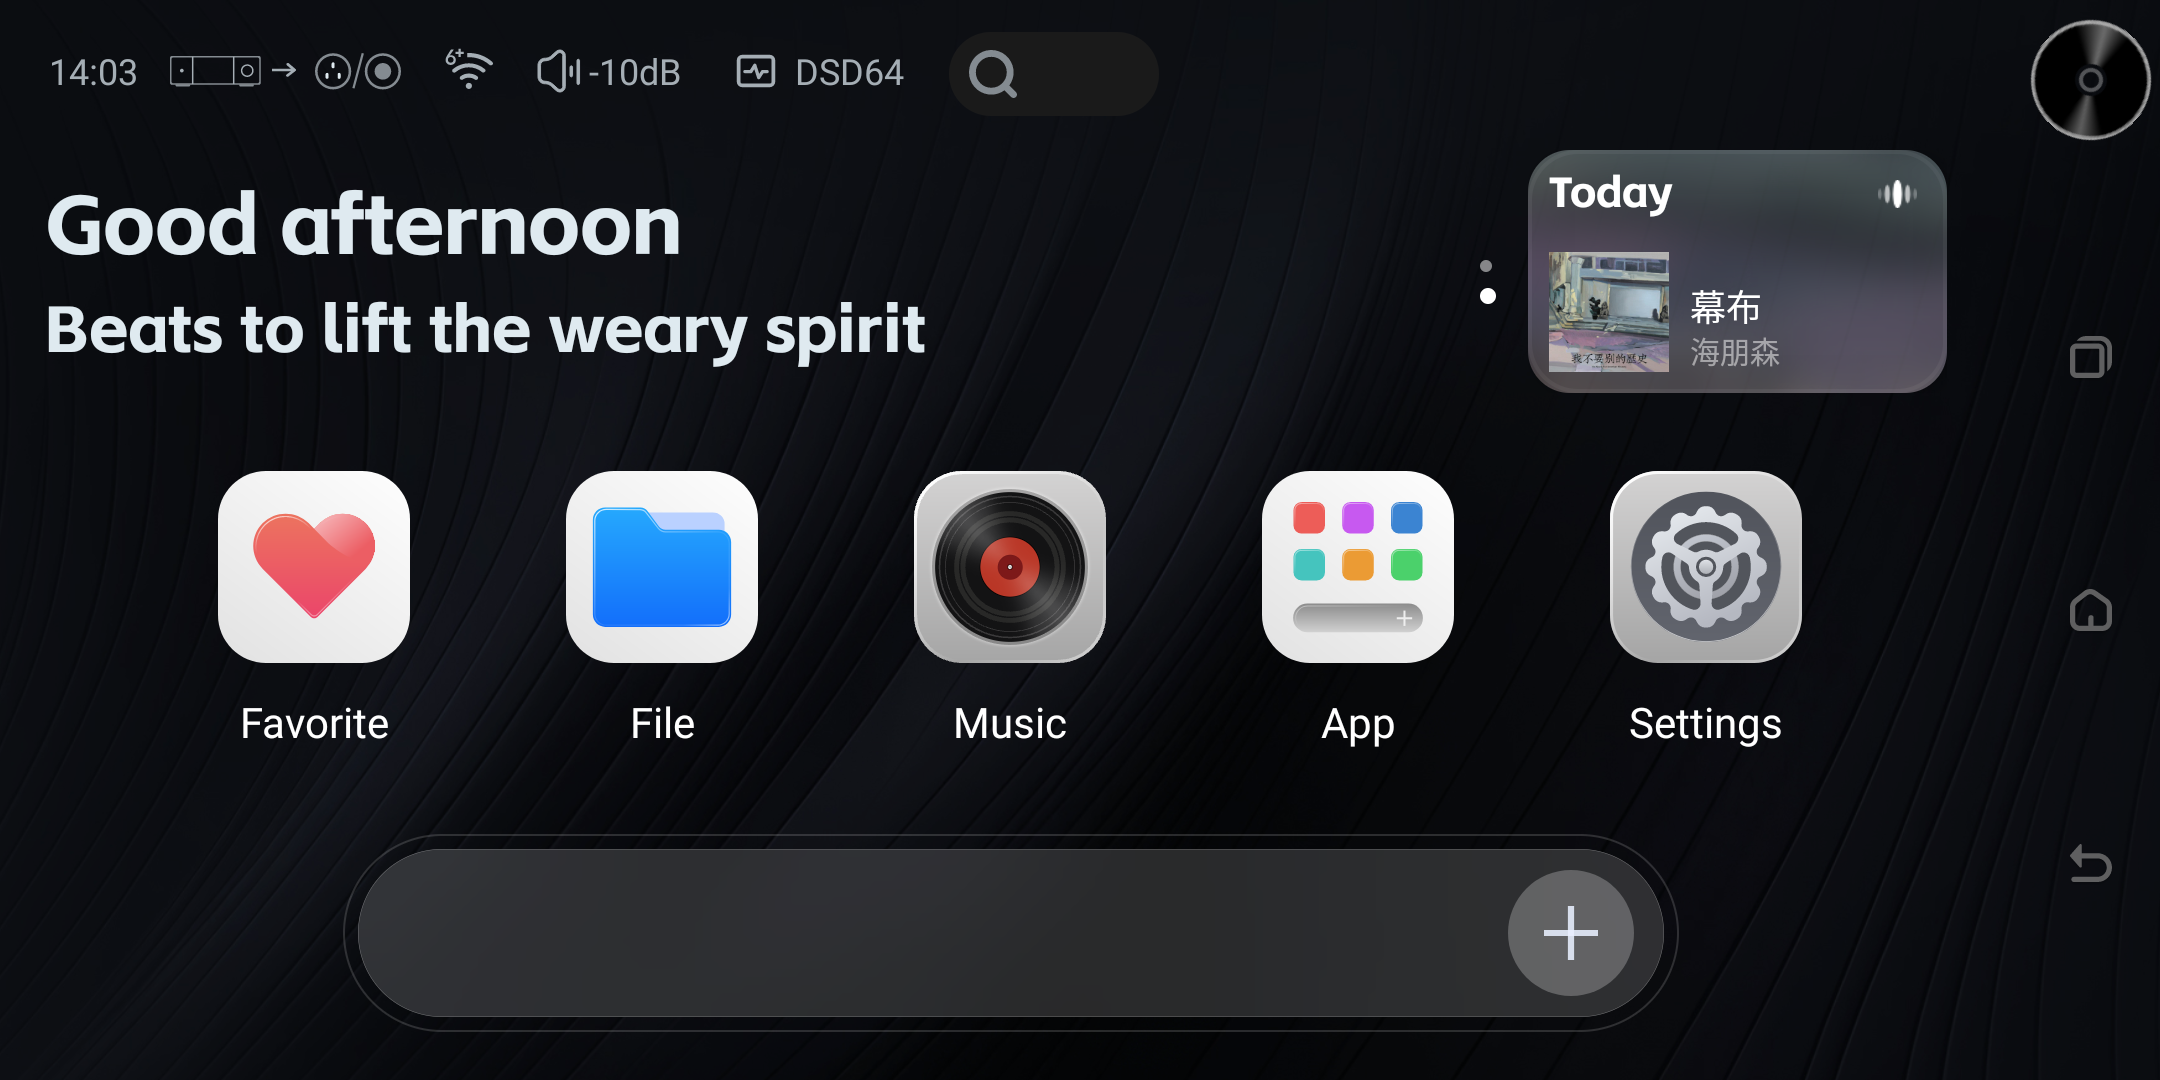
On the left side of the top status bar (to the right of the system clock), you can see an area made up of a waveform icon and a number (such as [waveform icon] 32.0 kHz in the illustration).
- Feature description
Numeric display: shows the audio format or sample rate currently reported by the device audio system. Available information varies with firmware and output route.
Purpose: use this indicator to check the reported playback state. The displayed sample rate alone does not prove that the complete playback chain is bit-perfect or that resampling and other processing are disabled.
3. Common states & scenarios
Standby / idle state: When the right-side playback control area shows "Waiting for music playback…", the value shown here (such as 32.0 kHz in the illustration, or the common 48.0 kHz) is usually the system's underlying default base sample rate, or the sample rate retained from the last playback.
Standard-quality playback: When playing ordinary MP3 or standard streaming music, it usually shows 44.1 kHz or 48.0 kHz.
Lossless / Hi-Res playback: When you use a professional music app to play high-quality lossless music with source-direct output enabled, this value will rise in real time with the song's source sample rate (e.g. 96.0 kHz, 192.0 kHz, or even higher).
⚠️ Tip (FAQ)
Why does the sample rate not go up when I play lossless music?
If a 192 kHz source is reported as 48 kHz, check the selected output, playback app, DAC capabilities, and active processing settings. The display alone does not identify the cause. Where supported, check the playback app’s original-rate or exclusive-output setting and compare with the connected DAC’s status.
About 32.0 kHz:
Connecting some Bluetooth devices, or certain low-bitrate radio/podcast formats, may trigger a 32.0 kHz sample rate, which is normal.
App Management
(Accessed by swiping up on the screen)
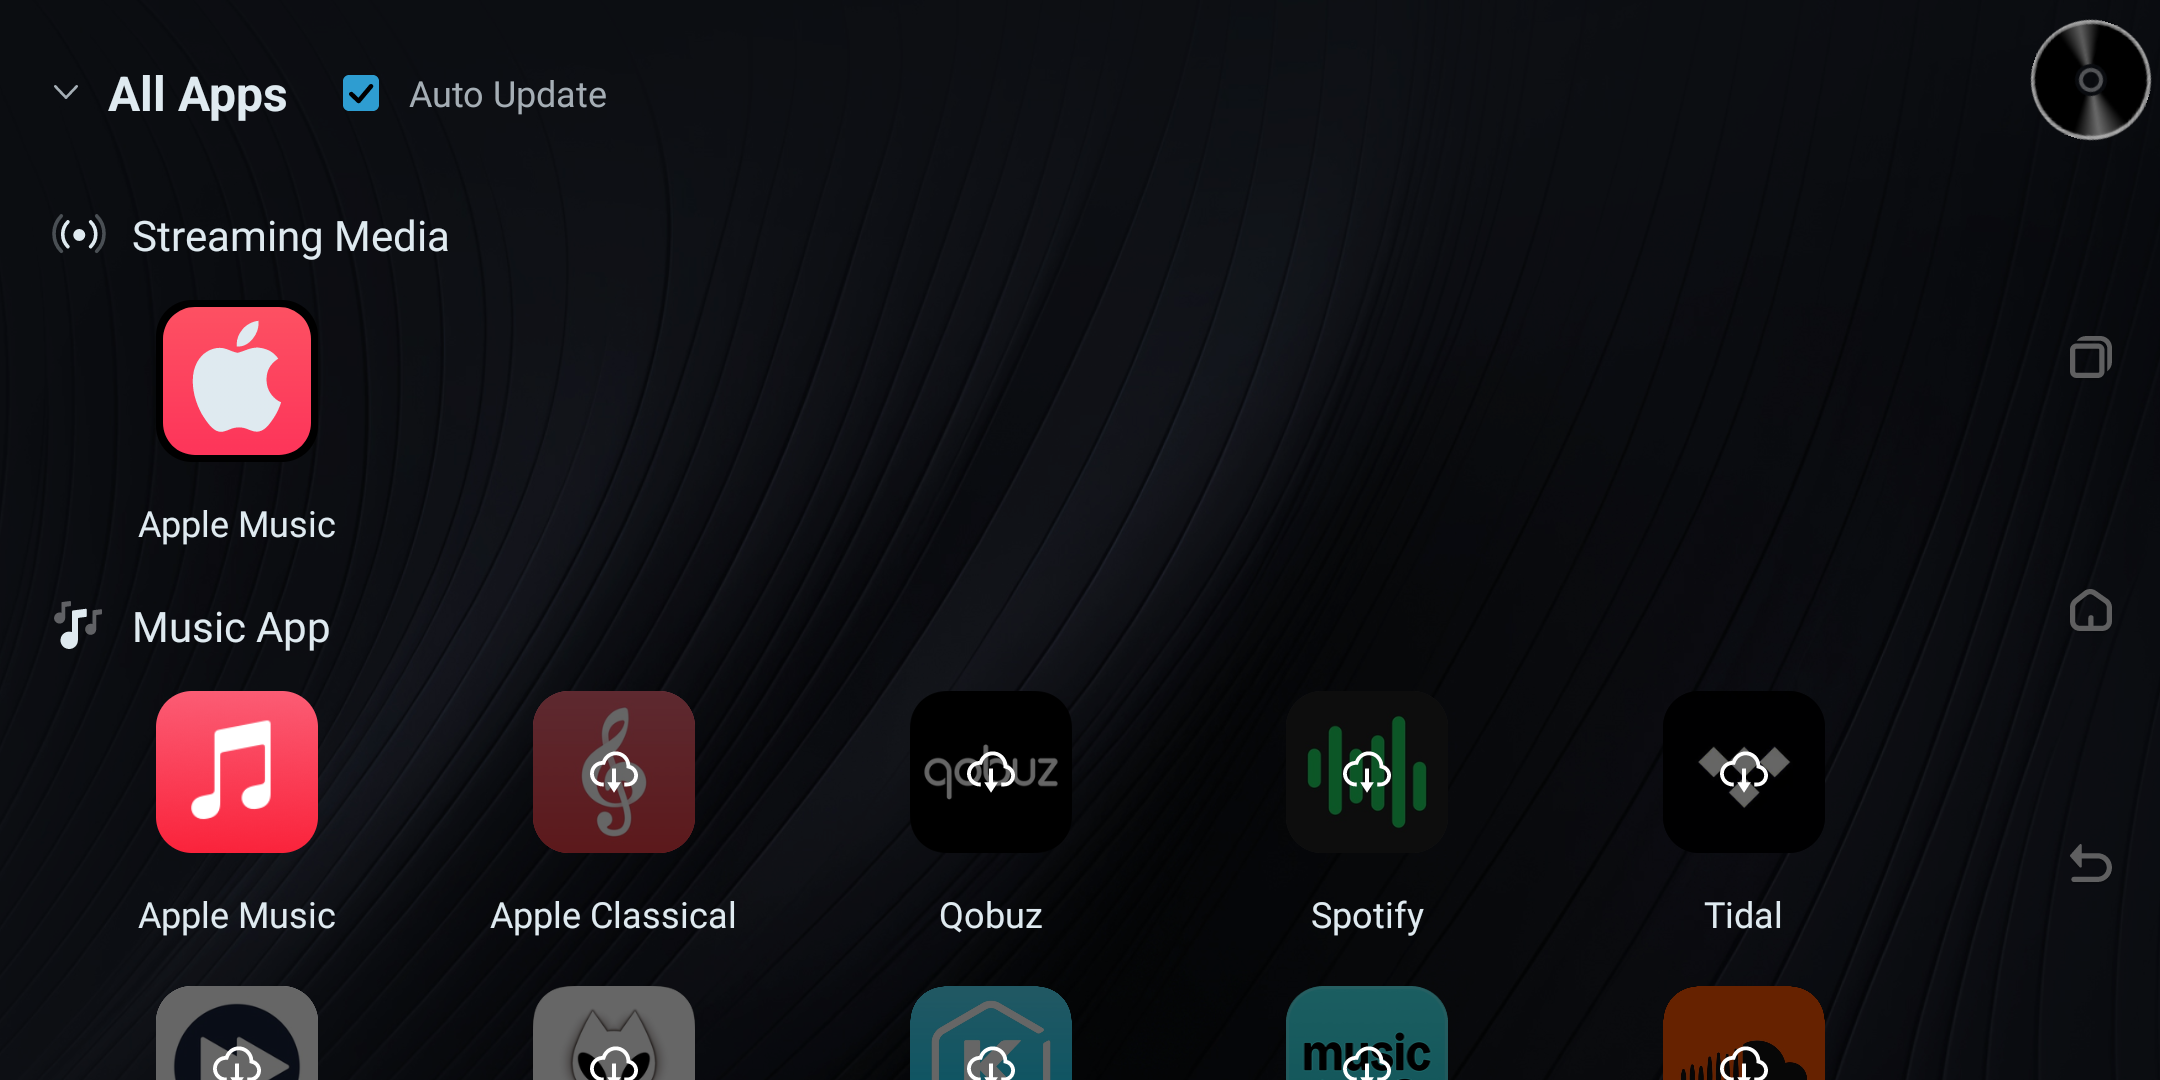
- Categorized browsing: Apps are automatically grouped into "Streaming" (e.g. Apple Music, Qobuz), "Online Cloud Drives" (e.g. Baidu Netdisk, OneDrive), "Media Playback" (e.g. Bilibili, Tencent Video), etc.
Global Music Control Center (CD Icon, Top-right)
The round CD icon at the top-right of the screen is not just decoration — it is the system's global music control core. No matter which screen you are on, you can use it to manage music quickly.
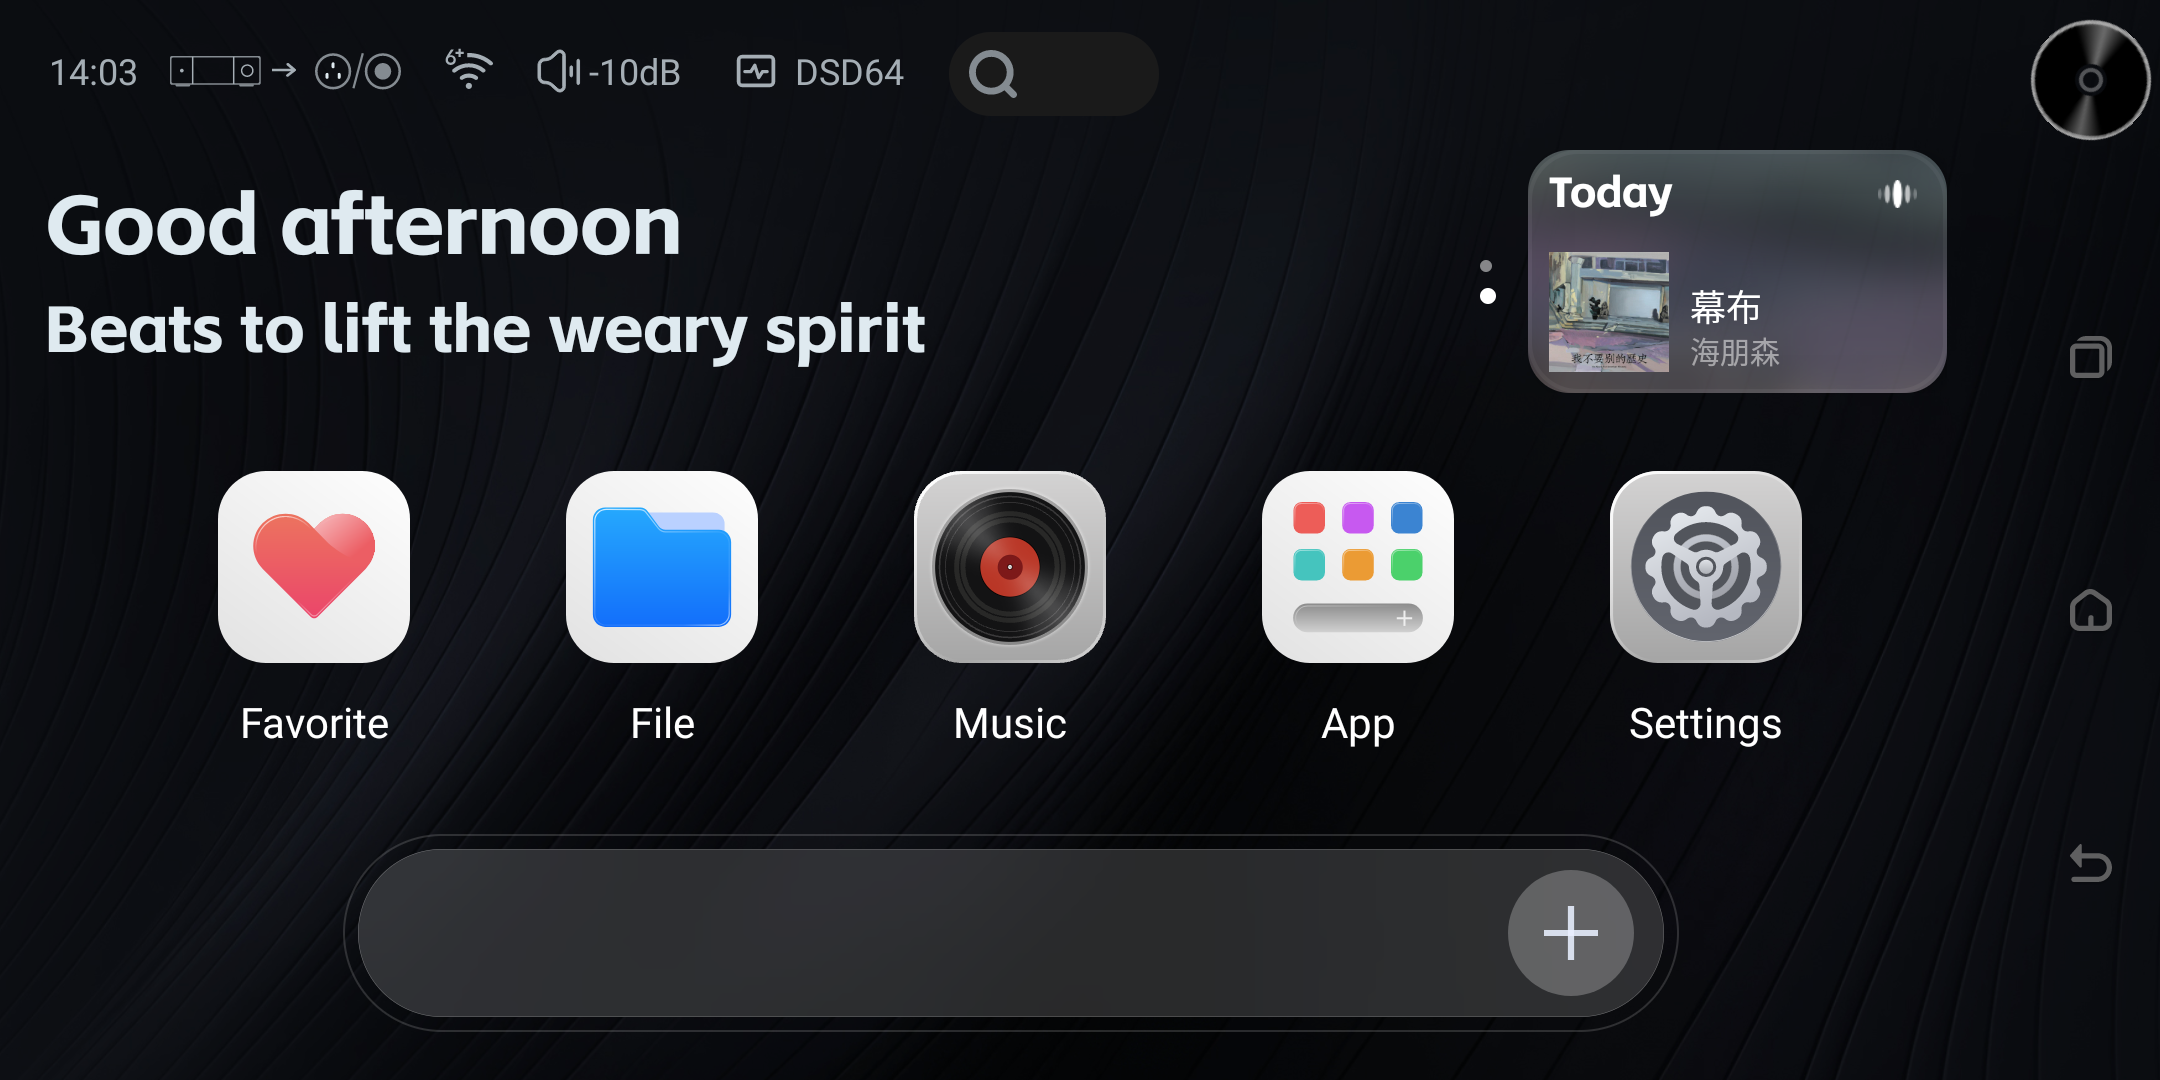
Visual Status
- Rotation animation: When music is playing, the CD icon rotates automatically, intuitively showing the playback state.
- Cover display: If the currently playing song has cover art (Album Art), the CD icon automatically loads and displays that image; if there is no cover, it shows the default vinyl-record style.
Touch Interaction
- Single tap the icon: Bring up the "Mini Control Panel".
- Info display: The panel shows the name of the currently playing song.
- Basic controls: Provides a Play / Pause button and a Collection (heart) button. (Note: Collection now supports unified management of local music and streaming-platform tracks — see the 4. Collection App guide.)
- Track switching (gesture): Swipe left or right in the popped-up control bar to switch songs (swipe left = previous, swipe right = next).
- Double tap the icon: Quick-jump function.
- While playing: Double tap jumps directly to the app currently playing the music (e.g. Apple Music) for viewing lyrics or more details.
- While not playing: Double tap launches and jumps to the system's local music player.
Status Bar & Volume Control Guide
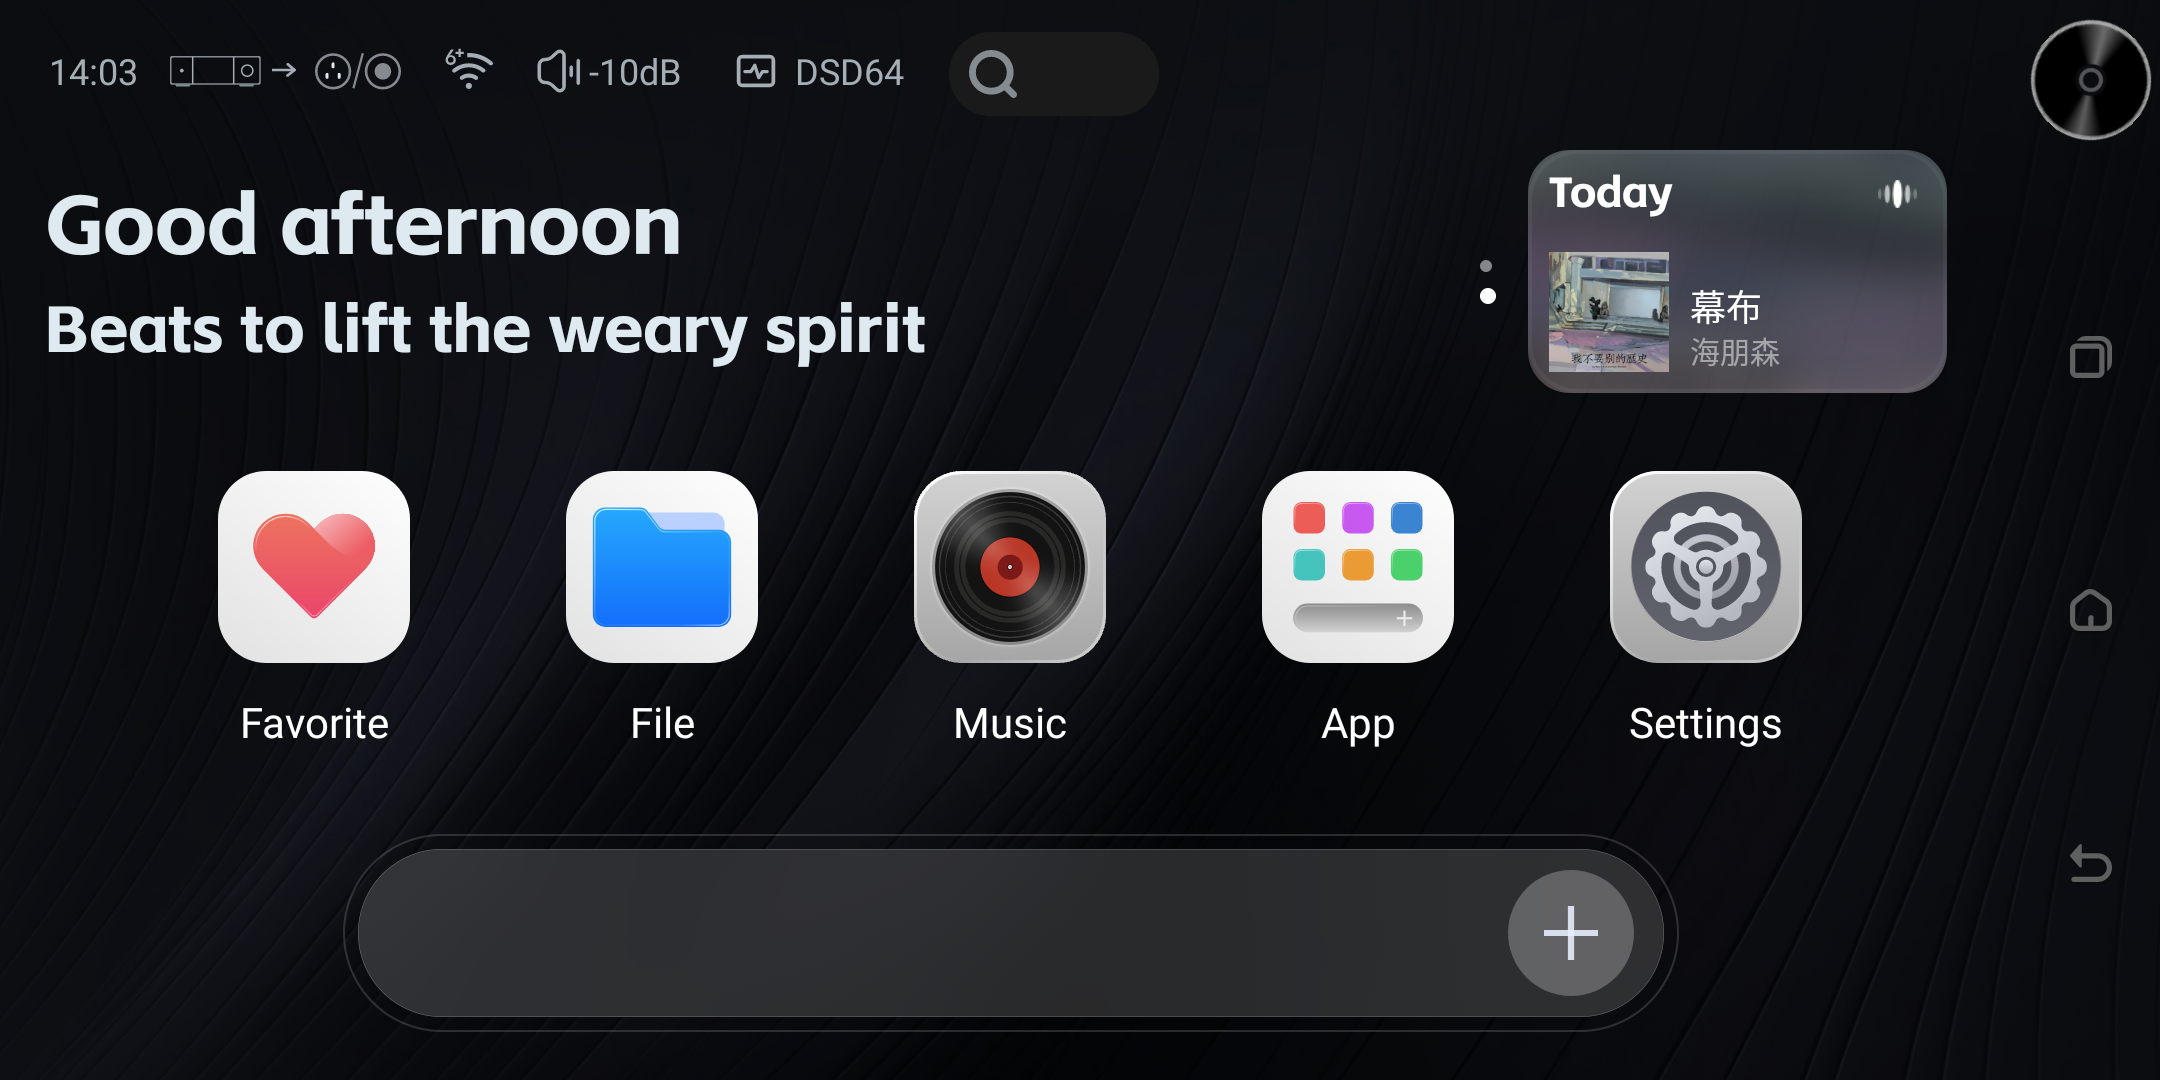
The top-left of the screen shows not only the time, but also integrates two very useful shortcuts for audio-channel switching and volume management. As of 2026-03-11, the Pro series also shows a real-time sample rate in this area.
Quick-switch Audio Input/Output Channels
The first icon to the right of the time is a shortcut to audio settings.
- How to operate:
- Simply tap the "Input/Output icon" to the right of the time.
- Function description:
- The system jumps immediately to the "Input/Output Settings" screen.
- Use case: When you need to quickly switch between "Local playback", "USB DAC", "Optical" or "HDMI" output, you can reach it in one tap without diving through menus.
Volume Adjustment & Digital Volume Control
The "Speaker icon" to the right of the Input/Output icon controls the system output volume. Depending on whether you enabled "Digital signal output volume control" in system settings, tapping this icon gives two completely different responses.
Scenario A: Volume Adjustment Enabled
When the system allows volume adjustment, tapping the speaker icon brings up a professional volume control dial.
- Operation feedback:
- A large volume knob appears in the center of the screen (see screenshot 4).
- The current decibel value is shown (e.g.
-50 dB).
- How to adjust:
- This screen intuitively shows the current output level. It is usually used to control preamp volume, suitable for directly driving headphones or connecting active speakers via analog output.
Scenario B: Pass-through Mode
If the speaker icon shows a message that preamp volume control is disabled in digital volume pass-through mode, adjust volume on the connected DAC or amplifier. Start at a low level before playback.
- Meaning:
- Digital volume pass-through disables the device’s digital volume attenuation for the supported output route. It does not automatically disable other audio processing.
- End-to-end bit-perfect playback also depends on the source, output route, and settings such as EQ, room correction, and upsampling.
- How to adjust volume:
- In this mode, use the physical volume knob of your externally connected device (e.g. external DAC, amplifier, or active speakers) to adjust the loudness.
Global Search (Supplement)
The "Search" bar at the top-center of the screen (see illustration: Home-9):
- Tap the search box to pop up a full keyboard input screen.
- Supports entering the name of a single track, album, or artist to quickly find music in the local or network media library.
Weather Widget & City Settings Guide
The blue card at the top-right of the screen is your real-time weather station — it shows current weather and also supports flexible city switching.
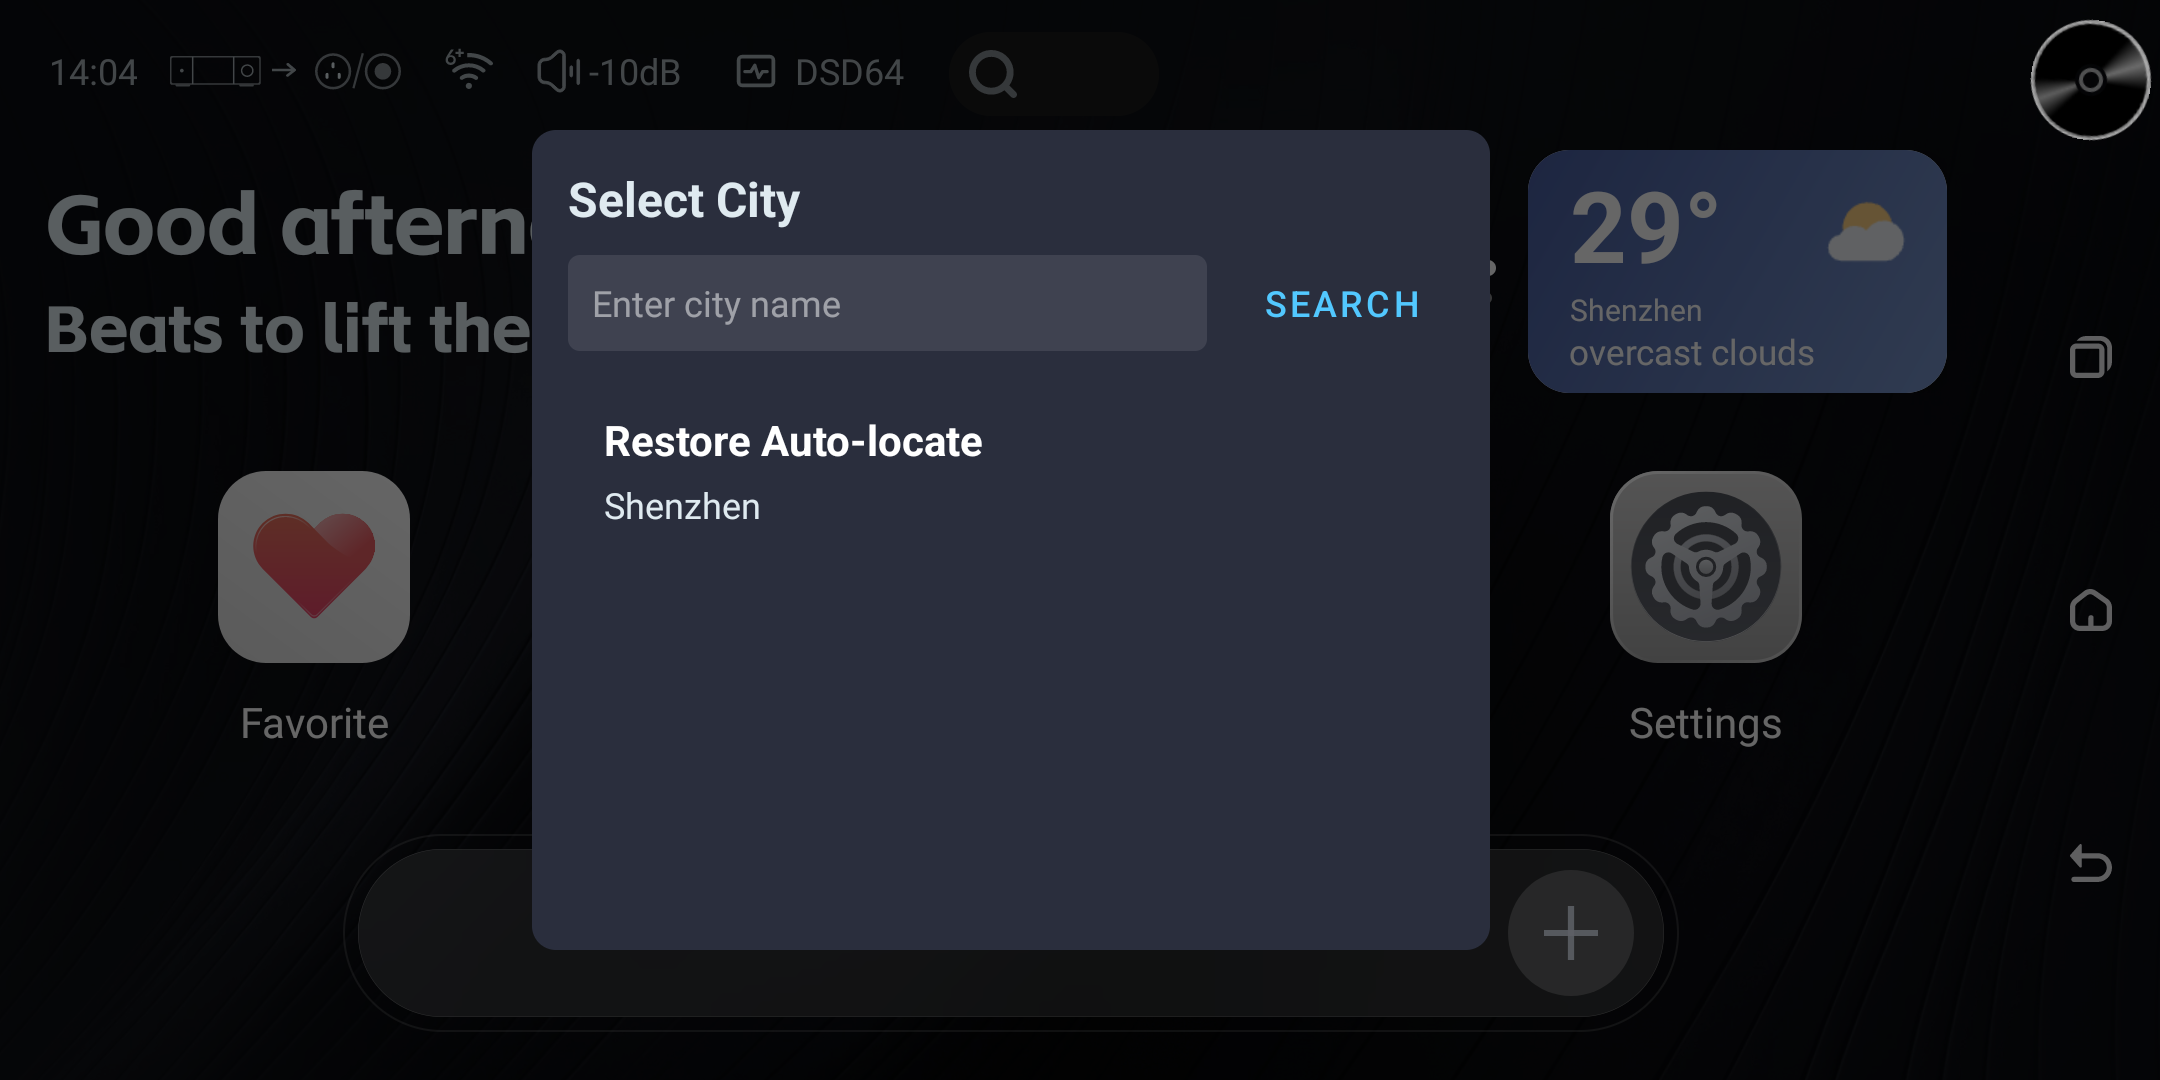
Quick Access to City Settings
- Target: The weather card at the top-right (the blue area showing temperature, city name, and weather icon).
- Gesture: Double tap the card.
- Feedback: The system pops up a floating window named "City Selection" (see illustration: Home-10).
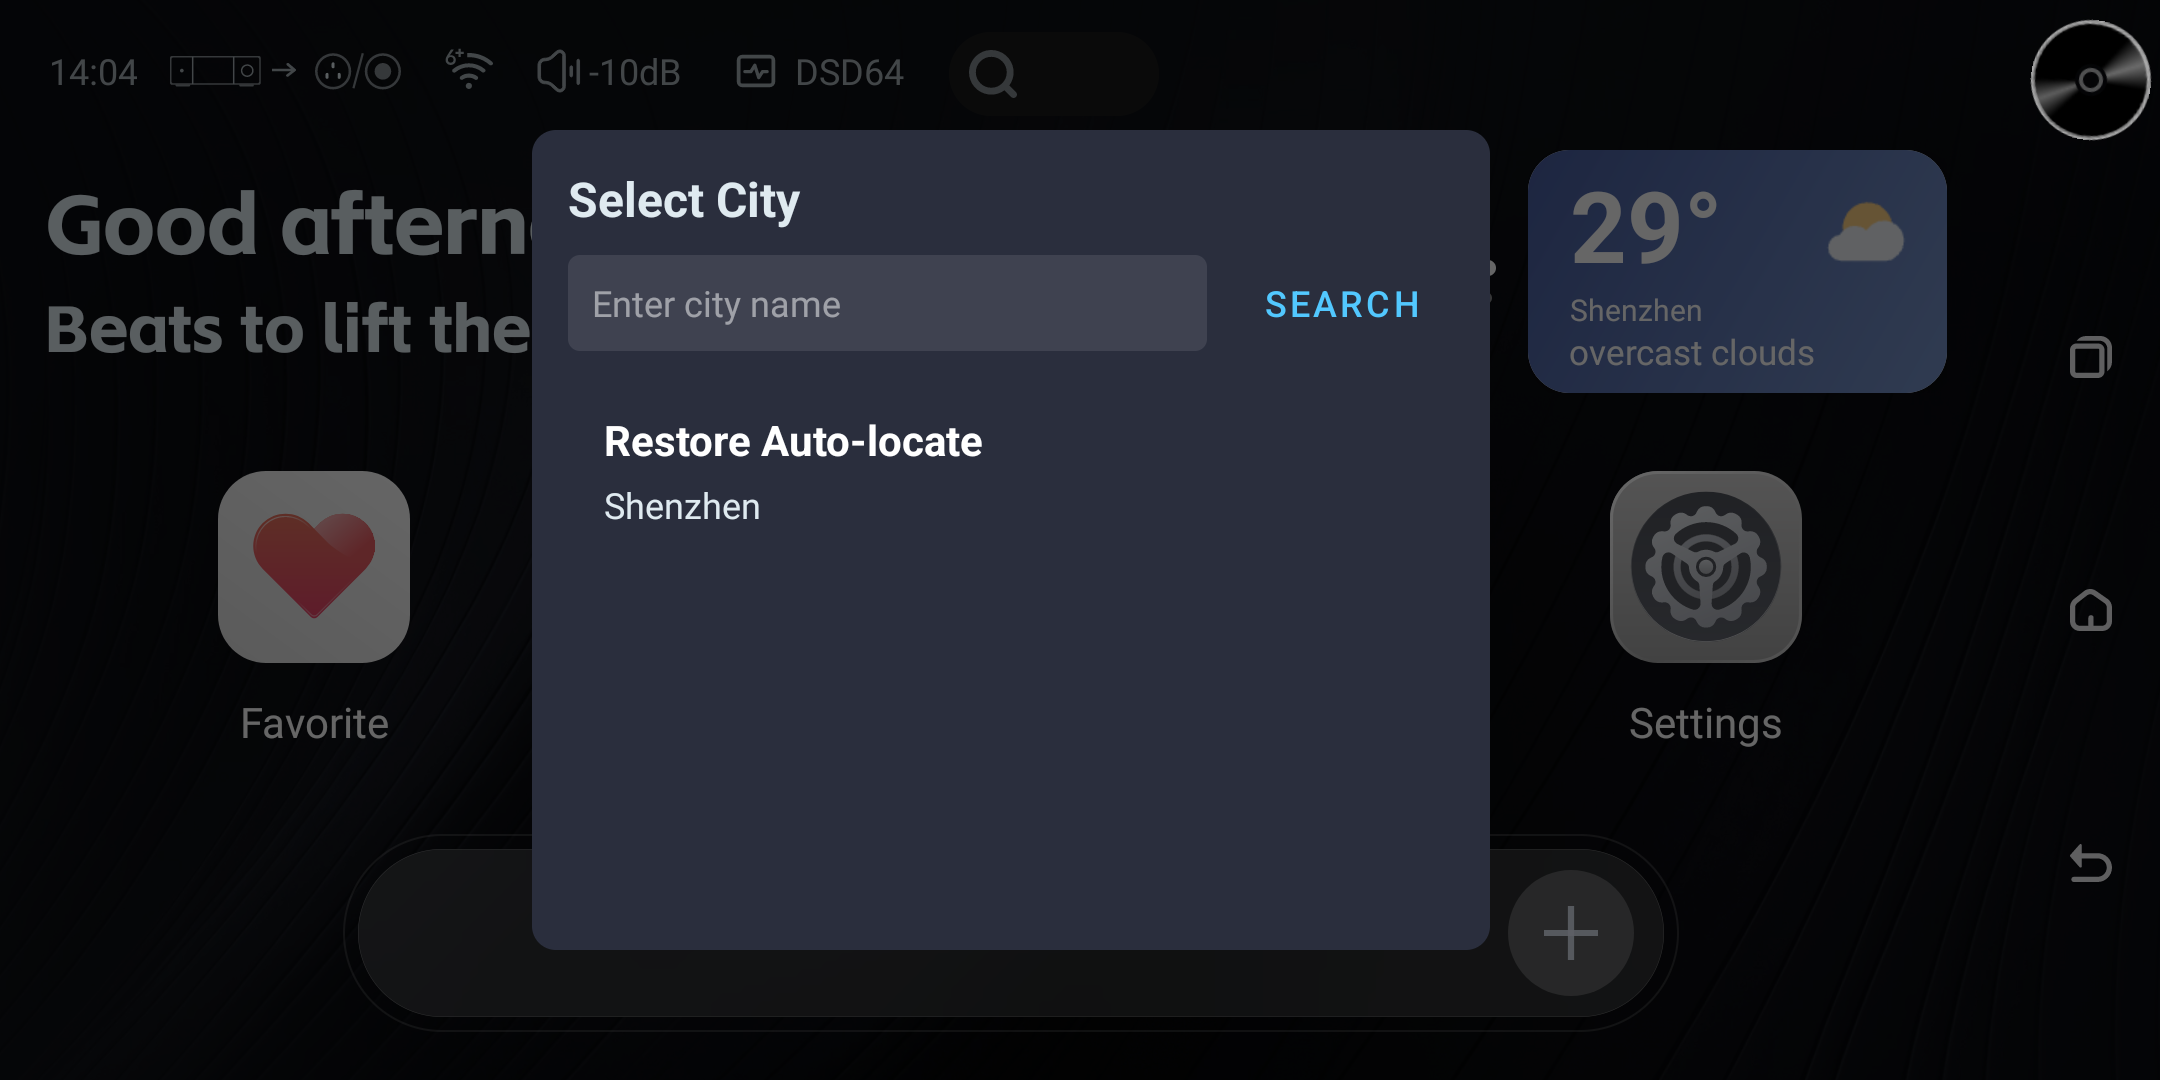
Switch City (Manual Mode)
If you need to view the weather of another city, or automatic location is inaccurate, you can manually specify a city with the following steps:
- Open the menu: Double tap the weather card to open the "City Selection" window.
- Search the city:
- Tap the input box and enter the city name you want to query (e.g. "Shenzhen").
- Tap the blue "Search" text button on the right.
- Select the result:
- The system lists matching locations (showing the city name and country/region code, e.g.
CNfor China). - Tap the correct option in the list (e.g. "Shenzhen CN"), and the system will immediately lock that city and update the weather data.
- The system lists matching locations (showing the city name and country/region code, e.g.
Restore Automatic Location
If you want the system to automatically obtain the weather for your current location based on network IP:
- Open the menu: Double tap the weather card.
- One-tap restore: Tap the blue text "Restore Auto Location" at the top-right of the window.
- Confirm status: The "Current mode" at the top-left of the window will change to "Auto Location".
Weather Card Information Explained
After setup, the main-screen weather card intuitively shows the following:
- Real-time temperature: Large-number display (e.g.
25°). - Weather condition: Shown via the icon on the right (e.g. sun = clear, cloud = cloudy) and text (e.g. "Clear").
- Location: Shows the name of the currently selected or located city (e.g. "Shenzhen").
Tips
Want to switch tracks quickly without opening the app? Just single-tap the CD icon at the top-right, then swipe left/right on the control bar — very convenient!
Want to change the output device? 👉 Tap the icon next to the time.
Want to adjust volume? 👉 Tap the speaker icon.
- A knob appears = you can adjust it directly.
- A pass-through prompt appears: adjust volume on the amplifier or DAC, starting at a low level.
The double-tap action is designed to prevent accidental touches while swiping the screen or tapping other buttons — make sure your tap is a single, continuous motion.